Share this

Thursday, June 19, 2014

Sweet Berry Jam

It's strawberry season!  This is probably one of my most favorite times of the year.  June is, after all, my favorite month, mainly due to my birthday being here.  But also, it's the month of the year where I really start seeing my garden take off, my peas start producing like crazy, and strawberries are in full swing.  We have a wonderful farm nearby that offers pick your own berries in addition to a beautiful farmer's market full of their homegrown produce and other locally grown crops.  So, off we went (with only moderate protesting from my husband) to pick berries.  And pick we did!  We came home with 12 quarts of beautiful berries that I declared "tasted like sunshine and happiness".  So, what to do with all these berries?  After making a strawberry pie and some home made strawberry lemonade, I got down to what I really picked these for:  jam, of course!

Last year I made 31 jars of strawberry jam.  It was actually my first attempt at jam making and was a great success.  I gave many jars away, and each time one walked out the door I could see my husband taking mental inventory of his stash.  But, thankfully he got through the winter without running out, with 4 jars left to spare.

 Last year, when I made my jam, I used regular pectin and LOTS of sugar.  It was also a much chunkier, looser jam.  This year, I switched it up a little and used the low sugar pectin, which allows me to play with my sugar content a little more.  See, when I eat jam, I like it to taste like sweetened fruit, not fruit flavored sugar.  And making your own is easy, I promise!  I was in my kitchen for a total of 2 hours star to finish.  So, here's what you need for:

Easy Strawberry Jam
Equipment
Large pot with canning rack for processing
Canning tongs
Funnel
Jelly jars with lids and rings
Large stock pot

Important canning note:  If you already have jars, great!  You're one step ahead of the game!  However, if those jars have lids and they have been used THROW THEM OUT AND GET NEW ONES!  You can find them in the grocery store for a couple bucks per dozen.  The jars and the rings can be reused, but used lids will affect the seal when you process, ie: your food won't keep.  Canning is fun, but canning safely is of utmost importance.  It keeps you from getting foodborne illness and wasting time, money and effort on a bad run.  OK, now that that's out of the way....

Ingredients
8 qts of strawberries
24 Tbsp powdered pectin, for low or no sugar recipes
5 c sugar (you can add more or less depending on you taste)
Note: some recipes call for lemon juice.  I did not use any.  With some fruits it is necessary to maintain acidity so that it will not harbor harmful bacteria even after canning.  According to the National Center for Home Food Preservation, strawberries don't need it. You can see their recipe here.

Put about 6 to 8 inches of water in your pot. You want enough so that when your jars are in the water they are completely submerged with about an inch of water over the top of the jars.  Turn on the heat and place clean jars (making sure they are free of chips and cracks first) into the pot.  Some say this is necessary for sterilizing, others say that boiling the jar and contents is enough to sterilize the jars.  Either way, pouring hot liquid into a cool jar will crack it.  (Trust me.  I may or may not have done that once...).  Usually when I do this step, my husband makes a smart ass remark like "Oh, glass water!  My favorite!".  His wit is why I married him....

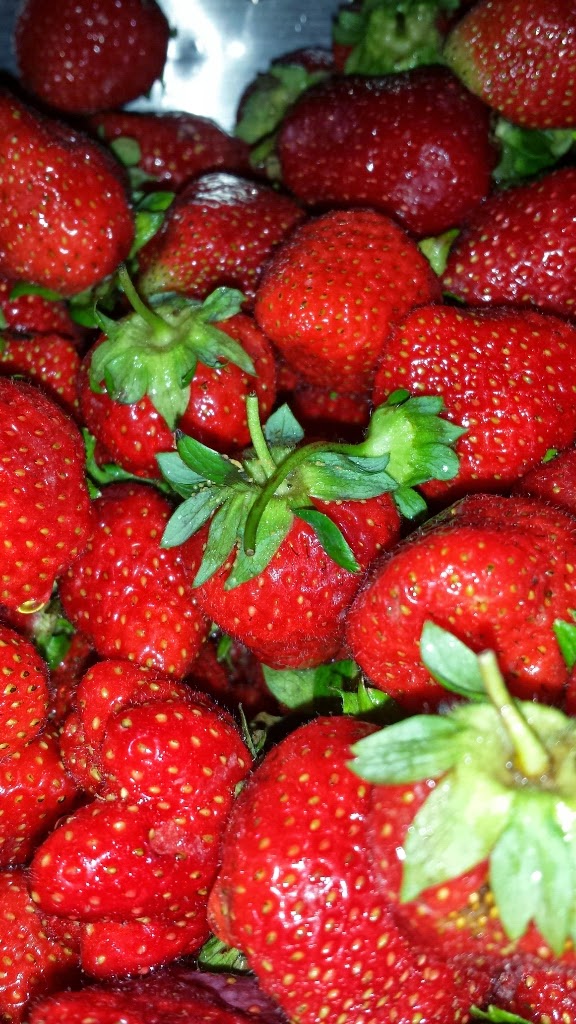
Now, to wash and hull your strawberries.  This is honestly the most time consuming part.  Rinse the strawberries, getting all dirt and debris off of them.  Then simply remove the tops, and throw them (the berries, not the tops) in your big pot.  My secret strawberry hulling
Forget knives!  This
Does the trick!
device?  A teaspoon!  I have found that a simple teaspoon dug down into the top plucks them out quickly and easily, with very little waste.

Once you are all cleaned and hulled, I add just a smidgen of water (like 1/4 cup) and start them on medium heat to get the juices flowing.  I take a wooden spoon and just stir and mash and break them up until they really start cooking down and getting really juicy.

Stick blender =
Best thing EVER!
Once the strawberries are soft, I use a stick blender to get them smooth.  You can leave them a little chunkier if you want.  Then turn your heat up on high to get them to a rolling boil that can't be broken by stirring.  Add the pectin, stirring constantly.   Add your sugar and boil hard for one minute, stirring constantly.  Remove from heat.

Now that your jam is made, use your tongs to remove jars from water.  (It should be boiling at this point).  Using your funnel, ladle hot jam into hot jars.
If you can find a canning funnel - get one!  Makes
things so easy!
Take a wet paper towel and wipe the rims of the jars clean.  Place a lid and ring on each jar, turning the rings until their finger tight.  Place jars into water bath, cover, and boil for 15 minutes.  You may have to do this in a couple batches depending on the size of your canning pot.

After time is up, carefully remove the lid and remove the jars and place on a tea towel.  Let them sit, undisturbed until completely cool.  Then, once they are cool, remove the rings, and gently press down on the center of the can.  If it pops in and out, then it did not seal.  If you don't feel it popping, it's good!  Any jars that didn't seal can be put into the refrigerator and eaten first.

And that's it!  Easy strawberry jam.  Probably the easiest way to preserve the berries from this too short season.

Monday, June 16, 2014

Brace yourselves.....blog posts are coming!

It's been a super busy time here at the Smith household.  I know, I know.  It pretty much feels like I dropped off the face of the earth, but, alas, I have not forgotten about my awesome little blog (or my readers!).  My only excuses are holidays, work, family, and just life in general.  Not to mention, it has been planting season here in good old PA, which has kept me pretty much occupied in every spare moment I have (which isn't many since I work weird hours.... Hopefully that'll be remedied by the beginning of the year!).  This year we have constructed flower beds (veggies need their pollinators!  Come on, bees!), expanded our garden plot to an 11 x 16 ft patch, maintained our approximately 1 1/2 x 20 ft pepper patch, built a compost bin (Guess who got power tools here for Christmas?  Hint: not my husband!), installed a stone path, mulched, installed a pole and bird feeder, maintained overflow in porch containers....I'm tired just thinking about it!  But the good news is, we have the most amazing, prolific patch of plant heaven right outside of our back door!   Well, except for the pesky groundhogs.  I won't lie - after losing 3 heads of beautiful romaine lettuces and 4 cauliflowers, I felt pretty defeated.  But, it appears to be under control (for now.....), so we are having our first harvests of lettuce, kale, peas, cauliflower, spinach, and radishes.
Rows of tomatoes

Look at those peas!

So.... I'm now feeling the need to share my list of crops.  I used a modified version of the square foot gardening method.  Modified because I don't use raised beds, but I am using the guidelines for number of plants per square foot.  It seems to be working well!  Everyone is happy and healthy and producing well.  I also experimented with carrots in a deep container, and so far, so good!
Container carrots

Without further ado, are you ready for the list? (You know you are!)

(Grown vertically on PVC trellises)
Peas
Watermelon
Cantaloupe
Pole beans
Pickling Cucumbers
Regular cucumbers


(Main garden)
Potatoes
Eggplant
Tomatoes (31 plants, 8 varieties)
Onions
Shallots
Tomatillos
Sweet peppers
Cauliflower
Cabbage
Kale
Carrots
Beets
Yellow summer squash
Zucchini, tomatoes, sweet peppers,
eggplant, and potatoes. 
Zucchini

(Pepper bed)
Habaneros
JalapeƱos
Cayennes
Hot cherries
Sweet cherries
Serranos
Poblanos
Hungarian wax
Tobasco
Scotch bonnets

I also am experimenting with a shaded lettuce garden, container carrots, and did my radishes in containers as well, which worked
amazingly!  And, of course, my herb garden.  Whew! I think that's it!
Cabbage, anyone? 


But all this amazing produce has me in the mood to cook.... And to share!  So, brace yourselves.... Posts are coming!